-
To define default units of measure:
-
From the main menu select Tools then Options from the drop down menu.
-
The User Preferences control table will be displayed.
-
Select the Units of Measure tab.

-
The Units of Measure table will display. Perform one of the following:
-
Choose the option button US or Metric to set all the units of measure to that selection.
-
Select Custom to define non-default units of measure:
-
To change units for a specific unit group: click the down arrow in the unit cell and select a unit from the drop down list.
Note: Modifying an individual unit group will change the option button to Custom.
-
A unit's precision is based on values less than or greater than a base value. To modify the precision of the unit, simply click in the appropriate precision cell and type in a new value.
-
Click
.gif)
-
Select
.gif) from the Units
and Precision Settings warning dialog pop-up box.
from the Units
and Precision Settings warning dialog pop-up box.
-
-
To set the default fonts:
-
From the main menu, select Tools -> Options from the drop down menu.
-
The User Preferences control table will be displayed.
-
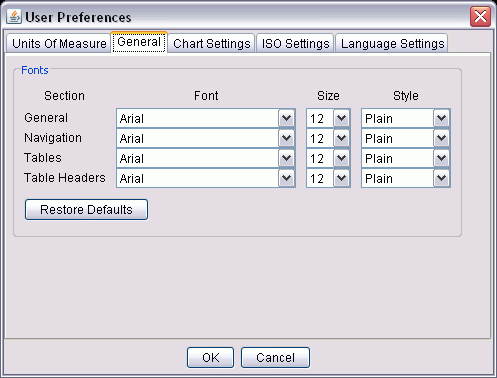
Select the General tab. The Fonts tablewill be displayed.

-
Click the drop-down arrow for Font, Size, or Style in the section to be modified.
-
Select
.gif) .
. -
Select
.gif) from the Units
and Precision Settings warning dialog pop-up box.
from the Units
and Precision Settings warning dialog pop-up box.
-
-
To set default chart settings:
-
From the main menu, select Tools -> Options from the drop down menu.
-
The User Preferences control table will be displayed.
-
Select the
 tab.
tab. -
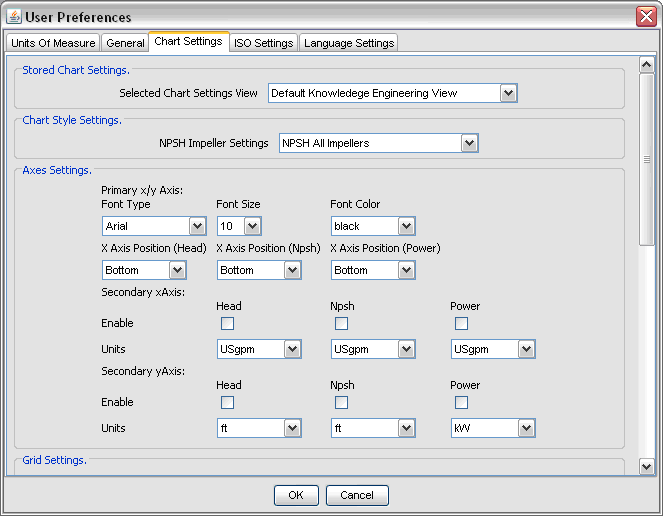
In the table, choose a chart setting view to modify. (Default Knowledge Engineering View or Price Book View.) With Price Book View, you can choose portrait or landscape mode.

-
Click the down arrow in the specific field(s) you want to set.
-
Pick a setting from the drop down list.
-
Select
.gif) to accept the change.
to accept the change. -
Select
.gif) from the Units
and Precision Settings warning dialog pop-up box.
from the Units
and Precision Settings warning dialog pop-up box.
-
-
To set default ISO Settings:
-
1. From the main menu, select Tools -> Options from the drop down menu.
-
The User Preferences control table will be displayed.
-
Select the
 tab.
tab. -
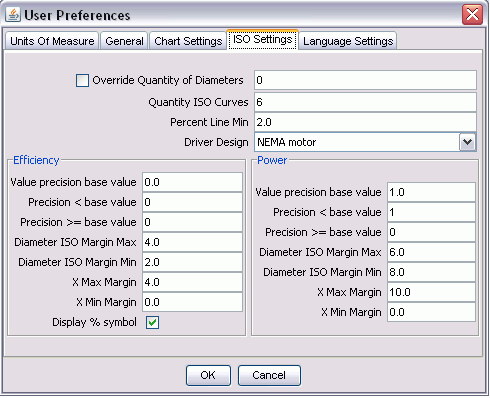
This tab controls how ISO lines are displayed on preview curves. The user can set how many lines to draw and how long they will be, as well as the precision of the label.

-
Select
.gif) to accept the
change.
to accept the
change. -
Select
.gif) from the Units and Precision Settings
warning dialog pop-up box.
from the Units and Precision Settings
warning dialog pop-up box.
-
-
To set translation languages:
-
From the main menu, select Tools -> Options from the drop down menu.
-
The User Preferences control table will be displayed.
-
Select the
 tab.
tab. -
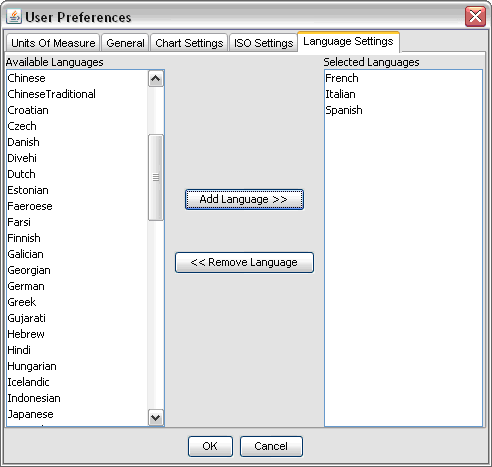
Choose which languages the database will include translations for, and add them to the list on the right.

-
Select
.gif) to accept the
change.
to accept the
change. -
Select
.gif) from the Units and Precision Settings
warning dialog pop-up box.
from the Units and Precision Settings
warning dialog pop-up box.
-